Welcome to Factivate! Factivate gives you an intelligent way to manage all of your data in one simple place.
Whether you’re a marketer, a VP, a CEO, or a single business owner, Factivate's simple spreadsheet-like design and advanced data intelligence features let you and your team manage, understand, and react to real-time data with minimal effort.
Getting Started with Factivate
Getting your team set up and running with a new platform is no easy feat, so we'll guide you through Factivate team onboarding with your time in mind. In a few minutes, you can have fully functional automated reports and dashboards to make you insanely better at your job.
If you need help customizing a report or are using Factivate Enterprise, we've got some special resources just for you.
Build from Expert Templates
Automated templates and dashboards make it easy to get started with big data reports and analysis. Organize and connect to as many third party accounts and save everyone time and money (goodbye to fat finger errors on your spreadsheet!)
There's no limit to the number of third party connectors you can add to your spreadsheet. However, you are limited to the number of account users you have on a per plan basis. (Looking for unlimited account users? Then a Enterprise account is right for you.)
Building an automated report from a template is pretty simple:
- If you haven't already done so, click on the plus button (+) in your Factivate home page.
- Select a template from your available list.
- Click on each "blue" colored tab in a template and go to the top ruler to connect your accounts (Facebook, Google, etc) and make sure you click on "Enable" so the data begins pulling. Nice!
- Do this for every blue tab.
- Rename your Spreadsheet template by double clicking on the Spreadsheet name at the top.
Invite & Impress Everyone
Now that you have a great grasp on your data and your activities, it's time to impress everyone else with your serious data analytics chops!
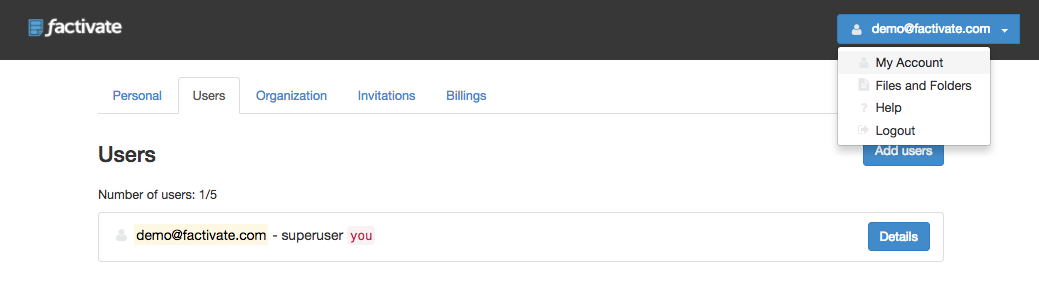
The "Users" page under My Account is where you can add (or remove) team members or clients. When adding members, don't just add your immediate team or clients. Instead think about every person who might want to read your data, build upon your report, or even someone in another department who currently puts up with building Excel reports. By giving others the same power of Factivate, you can minimize manual referencing errors and ensure your data can remain consistent across your organization.
To add new members, simply type in their email addresses.
#FactivateTips: You can share reports, dashboards, and even individual cells inside a spreadsheet while limiting read/write permissions with those users.
Creating Your First Custom Report
If you've ever used a spreadsheet, then Factivate will be as sweet as pie for you to pick up!
Factivate workbooks are where data is organized, connected, shared, and informed decisions will take place. They give everyone a non-manipulated perspective on their data. Workbooks are made up of Spreadsheets and Datasheets.
Spreadsheets represent your custom interface where you build your reports and dashboards. Datasheets are tabs marked by a "blue" background in the "tab name" section and they represent "connected" views that display all of the third party data from third-party connector/account.
Creating a workbook from scratch is easy! Let's break it down.
#Factivatetips: By default, Factivate Datasheets will fetch data for up to six months back (as long as the API allows it). Should you want more historical information to be pulled, you can also import all of your historical data as a .csv file. (If you're a Gold or Enterprise account holder, you can request your Datasheet to pull for more than 6 months by contacting your #Concierge representative.)
Auto Pull Data from Third Party Sources
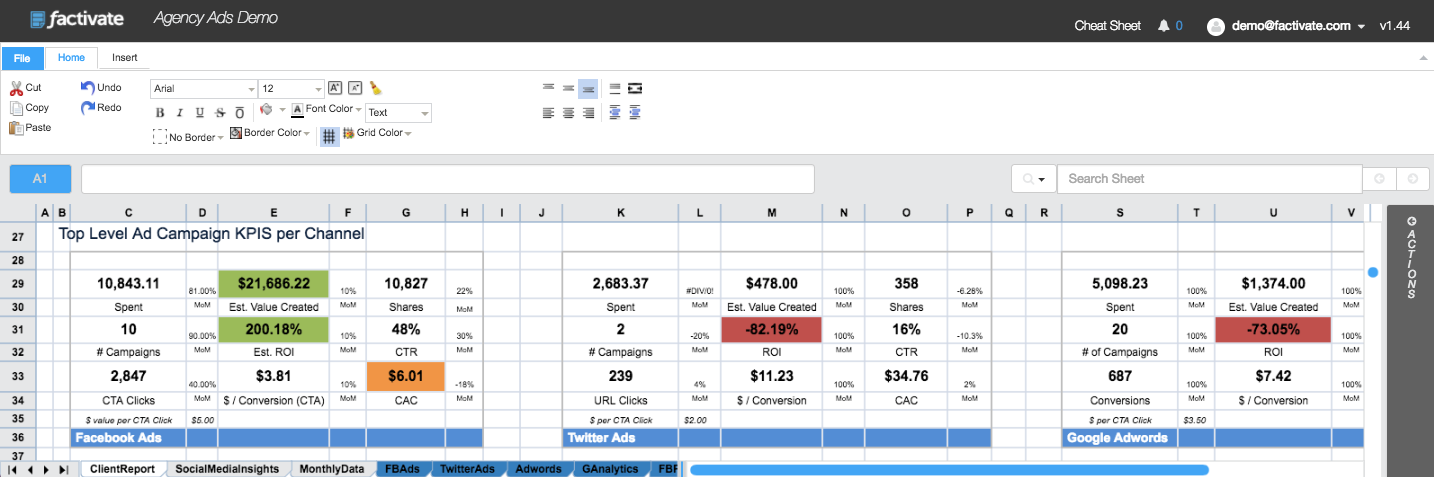
At the bottom of your Factivate workbook, locate and click on the plus button (+) to create a new tab. This will open up the list of types of sheets you can add (spreadsheet or datasheet).
Once you select your sheet type, go to the top of the page and make sure you are on the ruler tab that corresponds to the sheet (for example, if you added a tab for Facebook Insights, the tab on the ruler on top will read Facebook Insights).
Click on the "Authorization" icon to first connect your account to the outside service. Then, make sure you click on the Set Account icon and select which account you want to pull data from.
On the top ruler, you can search for the columns you want to pull into Factivate by: 1) typing in the Column Filter section or, 2) by scrolling (left-right) in the Feed Columns section. Select your column desired and click on "Add" (+). You can add as many columns as the API allows. Finally, click on Cloud icon to "Enable" your automatic data pulls.
Build formulas that reference "Connected" Datasheets
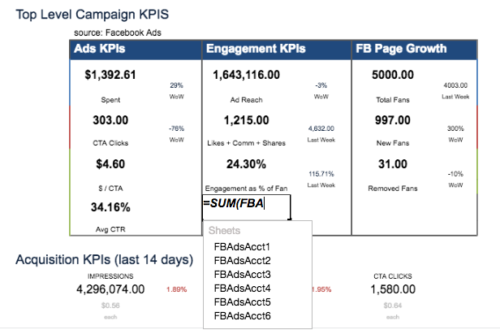
Factivate supports most of the popular spreadsheet formulas you already know. However, you will need to write a new formula should you wish to reference data on the "blue"/"connected" Datasheets. Writing this formula type is easy. All you have to do is add a DS( to your typical formula!
An example of such a formula is: =SUM(DS(Sheet1!'Impressions':'Impressions'))
This formula tells Factivate go add all of the numbers under the column called Impressions in the Sheet1 tab.
DS Formulas can have multiple filters to give you even more control. To learn how to use all of these formulas, you can learn more here.
#Factivatetips: Factivate support representatives are available to help you if you struggle with any of its formulas. You can contact support@factivate.com at any time. You can also see examples of the DS formulas in all of Factivate's templates.
Automated Reactions to Changes in Cells
Factivate provides cell-level action triggers to alert you whenever a specific data point changes beyond your comfort zone. These are included in the actions panel located to the right of your spreadsheet. Let's send an email when a cell changes!
- Select the email icon
- Click on the button "New" to create an action
- Add your email title, content, email address, etc.
- On the "When" Section - write your typical spreadsheet formula example =Sheet1!U8>1,000,000
- Save! Nicely done!
A Note on Sharing your Reports & Dashboards
Your workbooks, spreadsheets, or even cells can be shared with anyone who has a Factivate account. To do so, simply go to the very top of the page and click on the drop down menu:
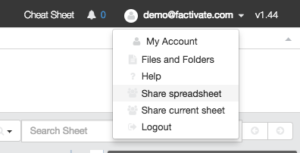
Now you can select to provide read, write, or administrative permission by simply adding the email addresses of whom you wish to share. They will automatically receive an email notifying them of their access.